No Touch Roasted Turkey

Aromatic Stuffing

  • 3 Granny Smith or Macintosh (tart) apples, sliced
  • 1 large or 2 medium white onions, skinned and cut into 6ths
  • 2 Cups of chicken broth
  • 2 tbsps dried Rosemary
  • 2 tbsps dried Thyme leaves
  • 2 tbsps Sage
  • 2 tbsps Tarragon
  • 1 large cinnamon stick broken into pieces

Herbed Butter

  • 1 lb salted butter, room temperature, sliced into pats
  • 1 tbsp dried Rosemary
  • 1 tbsp dried Thyme leaves
  • 1 tbsp Sage
  • 1 tbsp Tarragon

Cooking Instructions

Make the herbed butter the night before. Blend 1 lb of softened butter with the herbs and form it into a log, by rolling it up in a piece of plastic wrap. Twist the ends so no butter is exposed to  the air and refrigerate overnight.

Position oven rack so the turkey will be centered in the oven. Preheat the oven to 500ºF.

To prep the turkey, remove the package containing the neck, gizzard, etc. and set aside for making the gravy base. Pour a 1/2 cup of water into a microwave safe bowl or baking pan, put the aromatics in the pan with the water. The aromatics will be discarded after cooking, so don’t worry too much about cutting them up beautifully. Microwave for about 4 minutes on high. Remove and let cook until the cool enough to handle without burning yourself.

Take the butter out of the refrigerator, unwrap it and slice it into 1/4″ to 3/8″ thick disks. Loosen the skin over the breast portion of the turkey by working your hand up under it from the tail end. After loosening the skin, start working the butter disks in under the skin, pushing them as far as you possibly can. Continue until the breast area is completely covered with disks of butter. (This is much easier than trying to get softened butter under the skin with your fingers!)

Place a roasting rack in a roasting pan. Place the turkey on the rack, breast side up. Take the aromatics out of the dish and stuff them in both cavities. Pour any remaining water from the dish into the main cavity. Pour 1 cup of chicken broth into the main cavity. Try to secure the skin over the cavities using thin metal skewers.

Coat the outside with canola oil, sprinkle it with freshly ground black pepper and coarse ground salt.

Place the roasting pan in the 500ºF oven and add about a quart of water to the pan. Roast for about 30 minutes, or until the skin over the breast get golden brown. IMPORTANT: Keep an eye on it and don’t let it char the skin. Tent the breast portion of the turkey with aluminum foil and turn the oven down to 350ºF

I recommend using remote read thermometers inserted into the center of the breast and center of the thigh.

Keep an eye on the water level in the pan and add more as necessary, don’t let the pan go dry.

Roast until the breast reaches 155ºF and remove the foil tent to let the skin crisp up again. Remove from oven when breast reaches 160ºF and the thigh reads 180ºF. Let it rest for 30 minutes before carving.

 Gravy Base

  • neck, gizzard, heart
  • 1 tbsp minced garlic
  • 1/4 cup minced onion
  • 4 Cups of chicken broth
  • 1 tbsp dried Rosemary
  • 1 tbsp dried Thyme leaves
  • 1 tbsp Sage
  • 1 tbsp Tarragon
  • 1/2 tsp ground black pepper
  • 2 tsps kosher salt

Place the neck in a baking pan and roast at 350ºF until it is well browned on the outside. Slice up the gizzard and heart. Place the roasted neck, and the gizzard and heart in a large sauce pan. Add 1 cup of chicken broth and then add water to cover the neck by about 1/2″. Bring to a full boil and then reduce heat the low and let simmer for 2 hours. After simmering, remove turkey pieces from liquid and discard. Bring temperature up to medium and reduce the liquid by half. Set aside for making gravy later.

Red Beans and Rice – Conventional & Pressure Cooker Alternative

Ingredients

  • 1 pound dried red beans, rinsed and sorted over
  • 3 tablespoons olive oil
  • 1 1/2 cups chopped yellow onions
  • 3/4 cup chopped celery
  • 3/4 cup chopped green bell peppers
  • 1/2 teaspoon salt
  • 1/2 teaspoon freshly ground black pepper
  • Pinch cayenne (to taste)
  • 3 bay leaves
  • 2 teaspoons fresh thyme or 1 tsp dried ground thyme
  • 1 pound smoked sausage, split in half lengthwise and cut into 1-inch pieces (I prefer Andouille)
  • 1 pound smoked ham hocks
  • 3 tablespoons chopped garlic
  • 10 cups chicken stock
  • 4 cups cooked white rice

Vegetarian Option

For a vegetarian version, omit ham hocks and sausage, substitute vegetable stock for chicken stock, add

2 canned chipotle chilies in Adobo, minced, and 2 tsp liquid smoke (if desired). You could also add some vegetarian smoked sausage to the pot if you can find a brand you like.

 Cooking Directions

Prep time: 8 hours (See Pressure Cooker Alternative below)

Cooking time 2 ½ to 3 hours. (See Pressure Cooker Alternative below)

Place the beans in a large bowl or pot and cover with water by 2 inches. Let soak for 8 hours or overnight. Drain and set aside. (See Pressure Cooker Alternative below)

In a large pot, heat the olive oil over medium-high heat. Add the onions, celery and bell peppers and season with the salt, pepper, and cayenne. Cook, stirring, until the vegetables are soft. Add the bay leaves, thyme, sausage, and cook, stirring, to brown the sausage. Add the garlic and cook for 1 minute. Add the beans, ham hock and enough chicken stock to cover everything by 1 inch, stir well, and bring to a boil. (See Pressure Cooker Alternative below) Reduce the heat to medium-low and simmer, uncovered, stirring occasionally, until the beans are tender and starting to thicken, about 2 hours. (Should the beans become too thick and dry, add more chicken stock, about 1/4 cup at a time.)

Remove from the heat and with the back of a heavy spoon, mash about 1/4 of the beans against the side of the pot.

Remove the ham hock, let it cool enough to handle and then carve/strip the meat off the bone, discarding the skin, fat and bone. Return the ham hock meat to the pot. Return to the heat and continue to cook until the beans are tender and creamy, 15 to 20 minutes. Remove from the heat and remove the bay leaves.

Serve over steamed white rice.

 Pressure Cooker Alternative

Prep time: 45 minutes

Cooking time 1 hour.

This meal comes together a lot faster and still tastes just as great if you cook it in a pressure cooker. I use a Fagor Rapid Express cooker that runs at 15psi.

You will not need to soak the beans overnight for this method. Follow the above directions and after the liquid starts to boil, place and lock the lid on the pressure cooker. Follow the manufacturer’s directions for bringing the cooker up to pressure. As soon as it has reached pressure, turn the heat down to low and let it cook under pressure for 30 minutes.

Do a quick release of the pressure by placing the cooker in your sink and running cold tap water over it until the pressure has dropped off and it’s safe to open the lid. Test the beans for doneness. If they are still too firm, repeat the pressure cooking process and let them cook for an additional 5 minutes under pressure. Quick release the pressure and test again. Repeat until you are happy with the tenderness of the beans.

With the back of a heavy spoon, mash about 1/4 of the beans against the side of the pot. Remove the ham hock, let it cool enough to handle and then carve/strip the meat off the bone, discarding the skin, fat and bone. Return the ham hock meat to the pot. Return to the heat and cook (not under pressure) until the beans are tender and creamy, 5 to 10 minutes. Remove from heat and remove the bay leaves.

Serve over steamed white rice.

Old Fashioned Deli Corned Beef

This recipe takes a ton of patience, but it’s not a lot of work for the outrageous reward. This is NOT your store bought corned beef that is injected with brine and shipped with a plastic packet that has approximately 1 Tbsp of pickling spices for cooking. This has the flavor I remember from eating in Jewish Delis in NYC.

426091_2851208537255_1563256600_n

Ingredients

Pickling Brine

  • 2 quarts water (filtered or bottled)
  • 1 cup kosher salt, table salt is not recommended.
  • 1/2 cup brown sugar
  • 3 teaspoons Prague Powder #1 (Curing Salt #1, pink salt #1) Do not use Prague Powder #2 it is not for wet curing meat.

Pickling Spices

  • 1 cinnamon stick, broken into several pieces
  • 1 teaspoon mustard seeds
  • 1 teaspoon black peppercorns
  • 8 whole cloves
  • 8 whole allspice berries
  • 12 whole juniper berries
  • 2 bay leaves, crumbled
  • 1/2 teaspoon ground ginger
  • 2 pounds ice

Cooking Ingredients

  • 1 – 5 pound beef brisket flat, trimmed of most of the fat. (Don’t discard the fat!)
  • 1 large sweet onion
  • 4 stalks celery
  • 1 bag of baby carrots
  • 2 cups water
  • Reserve two tablespoons of the pickling spices.

Curing Instructions

Place the 2 quarts of filtered water into a large 6 to 8 quart stockpot along with salt & brown sugar.

Cook over medium-high heat until the salt and sugar have dissolved. You do not need to boil it, just make sure that the salt and sugar have dissolved. Turn heat down to medium and add the Prague Powder #1, cinnamon stick, mustard seeds, peppercorns, cloves, allspice, juniper berries, bay leaves and ginger.

Let it simmer for two minutes. Remove from the heat and add the ice. Stir until the ice has melted. If necessary, place the brine into the refrigerator until it reaches a temperature of 45º F. Once it has cooled, place the brisket in a 2-gallon zip top bag or sealable plastic container and add the brine. Seal and lay bag flat inside a container, cover and place in the refrigerator for 7-10 days. I used a tall 2 gallon container like the Rubbermaid cereal containers and I used the big chunks of fat I trimmed off the brisket to hold the beef submerged in the brine. Check daily to make sure the beef is completely submerged and flip the bag of shake the container to stir the brine.

Cooking Instructions

After 7-10 days, remove from the brine and rinse well under cool water.

I prefer to oven braise it rather than boil it. I used a large roasting pan and heavy duty aluminum foil to cover it.

Adjust the racks in your oven so the roasting pan will be in the center of the oven.

Preheat the oven to 275ºF.

Into the roasting pan, put two 14 oz cans cans of Swanson low sodium beef broth, one large sweet onion (roughly chopped), 4 celery stalks (roughly chopped), 1 bag of baby carrots. Add the reserved two tablespoons of pickling spices and 2 cups of water. Place the rinsed brisket in the center of the pan. Cover pan with heavy foil.

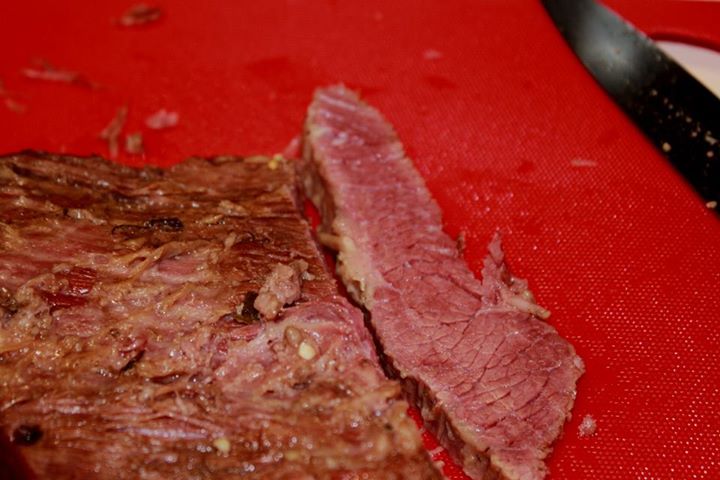
Cook for 2 1/2 to 3 hours or until the meat is fork tender. Remove from the pot and thinly slice across the grain.

Died and Gone to Heaven Pork Ribs

Rib Prep

I really prefer St. Louis Cut (SLC) ribs! To make SLC ribs, take a slab of spareribs, cut off the rib tips and square up the pointy end. What remains is a flat rectangular slab called the St. Louis cut.

IMG_2291Prepare the ribs the night before!

Rinse the ribs in cool water to remove any bone bits from the butchering Pat dry with paper towels.

Chances are that your ribs will still have the membrane on the back side. You really need to remove this membrane. It gets leathery and hard to chew, it keeps fat in, and it keeps smoke out. Insert the handle of a flatware (table spoon), or the tip of a butter knife under the membrane, then your fingers, work a section loose, grip it with a paper towel, and peel it off. After the membrane is off, trim the excess fat from both sides.

Coat the meat with a thin layer of vegetable oil. The oil reacts with the spices and releases all of their wonderful flavors! Sprinkle enough rub to coat al surfaces. Use 1 to 2 tablespoons per side, don’t sprinkle so heavily that yoiu can no longer see the meat. Spread the rub around on the meat, massage it in a bit. Wrap the slab with clear plastic food wrap and put it in the refrigerator overnight.

See Memphis Style Rub recipe at end of note.

Cooking

Preheat your smoker to about 225°F and try to keep it there throughout the cook.

Do not rely on the cheap cooker mounted bi-metal dial thermometers!

You can buy very reliable after-market dial thermometers from Tel-True.

I like to use a combination of Stubb’s Briquettes (Available a t Lowe’s), Cherry Wood and Apple Wood smoking chunks for the cooking process. For the fire, I use a technique called the Minion Method. You do not need to soak your smoking wood, EVER! The water barely penetrates the surface and evaporates in just few minutes when it’s in the smoker.

The concept behind the “Minion Method” is simple:

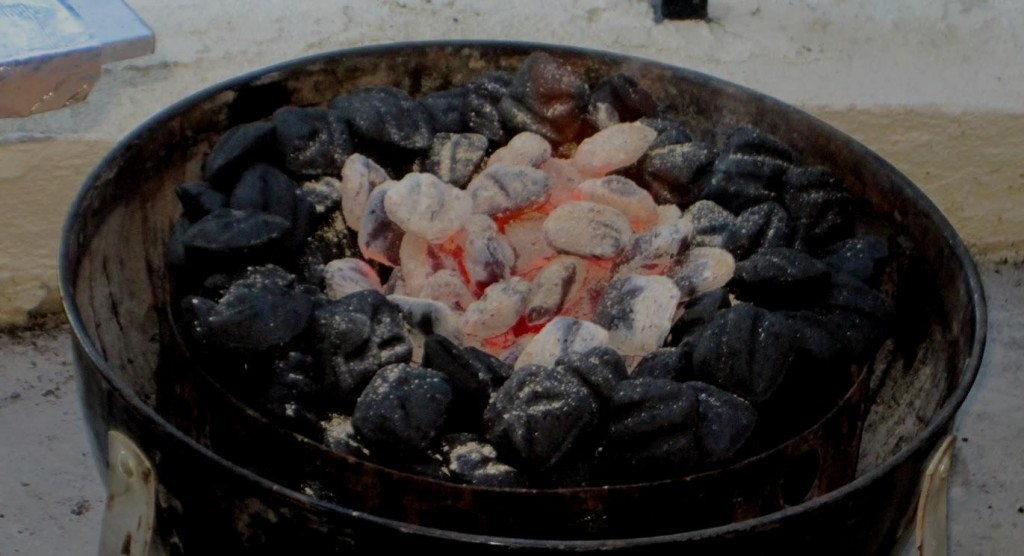
  • Place a small number of hot coals on top of a full charcoal chamber of unlit briquettes. I like to intersperse my smoking woods throughout the charcoal so they light as the charcoal around  them gets hot.
  • Open the top vent fully and never touch it during the cooking process. If you restrict the airflow out of the top you can get creosote buildup inside the smoker and it will ruin the flavor of the meat. Use only the bottom vents to control the amount of air entering the cooker, to keep the fire burning low and steady.
  • The unlit fuel catches fire gradually throughout the cooking session, resulting in long burn times of up to 18 hours, depending on weather conditions.
The Minion Method
The Minion Method

One of the advantages this method has over the Standard Method is that there’s less of a chance that the cooker will run hotter than you want. This is because it’s easier to start with just a few hot coals and bring the cooker up to 225-250°F than it is to start with a red-hot cooker and fight to bring it down to 225-250°F.

Unwrap the slabs and place them in the cooker with the the meat side up. Close the lid and walk away! Monitor your cooking temperature and adjust the vents in VERY SMALL INCREMENTS to maintain between 200-250ºF throughout the cooking process.

RULE #1 of BBQ-If Yer Lookin’ You Ain’t Cookin’!

Ribs are one of the few meats on which you cannot use a thermometer because the bones are too close to give an accurate reading.

Allow 5 to 6 hours for St. Louis Cut ribs and spare ribs. The exact time will depend on how thick the slabs are and how steady you have kept the temperature. If the ribs are jammed close together because you’re using rib racks to fit more ribs in your cooker, you may have to add an hour to your cooking time.

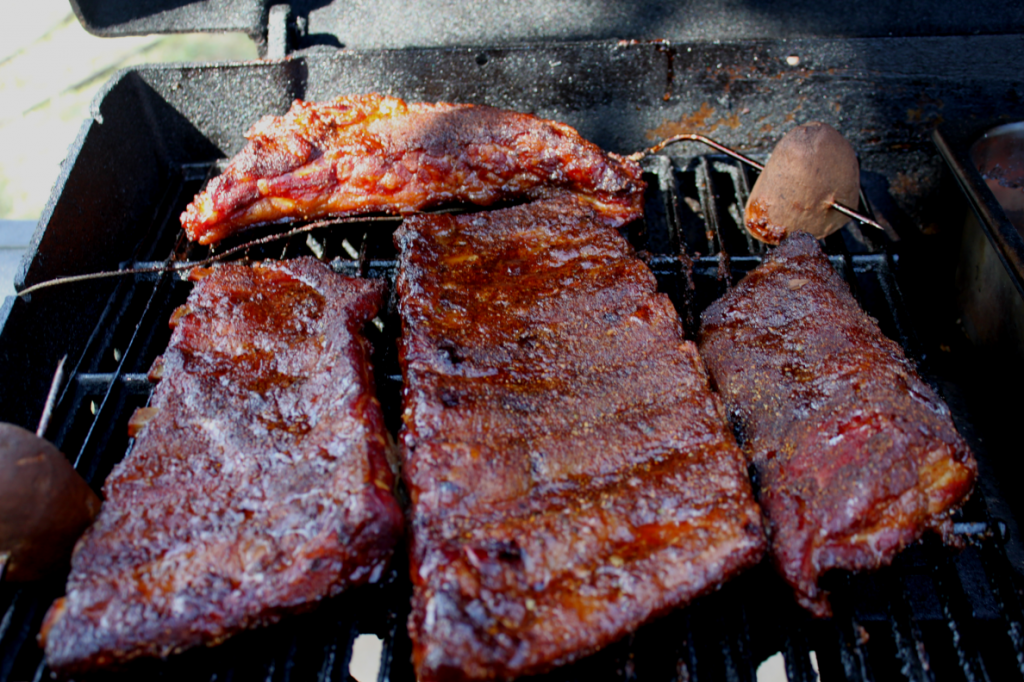
To check if they are ready, perform the bend test. Pick up the slab with tongs and bounce it gently. If the surface cracks, it’s ready.

If you decide to sauce your ribs a bit, use your favorite BBQ sauce. One coat of a thick sauce should be enough. Thinner sauces may need two coats. Return the ribs to the  225ºF cooker and let the sauce set and caramelize, anywhere from 10 to 20 minutes. Keep an eye on the ribs and pull them before the sauce starts to burn.

ENJOY!

Memphis Style Rub

Ingredients

  • 3/4 cup firmly packed dark brown sugar (for diabetics you can substitute Splenda Blend Brown Sugar)
  • 3/4 cup Turbinado (Raw Sugar) sugar (there is no diet substitute for this as most sugar substitutes don’t caramelize)
  • 1/2 cup Spanish Paprika
  • 1/4 cup Morton’s kosher salt
  • 1/4 cup garlic powder
  • 2 tablespoons fresh ground black pepper
  • 2 tablespoons ground ginger powder
  • 2 tablespoons onion powder
  • 2 teaspoons rosemary powder